Organizing pantry contents can be a real challenge. Here are some tips to make it easier: Lean into your creative side and create a system that works for you. Make your storage system as simple as possible and organize items according to frequency of use. This will save you time and frustration. Also, make sure you label everything clearly.
Lean into your inner designer
Home edit’s signature style is one that incorporates a lot of space between objects, making things appear as if they’re on display. While there’s no secret method for organizing the pantry, following the six tips below will help you maintain the design over time.
Create a system that works for you
Following the tips of the Home Edit ladies can help you create a system that is easy to maintain. One of the most important tips is to designate zones in your pantry. This will allow you to organize your products by category and help you use the space better. You can also keep your most frequently used items in easy-to-reach spots.
Pantries and fridges tend to be high-traffic areas in the home. Therefore, you need to have a system that is simple to follow and functional for all members of the household. For instance, you can use color-coded bins for easy identification. Or, you can keep kids’ snacks in lower shelves to make them easier to access.
Another way to create a system is to create a schedule. Shearer and Teplin recommend that you organise the pantry at least once a week. You can also use a timer to help you remember which days to organize each section. They also recommend that you use specific storage systems for different rooms.
Organize by frequency of use
While there are many ways to organize the pantry, one of the most effective is to organize by frequency of use. This is an easy way to keep items that are similar in use in one place and avoid having to dig through many drawers to find something. The next time you’re in your pantry, consider your habits and create discrete storage areas for each item. For example, you may create a beverage station, breakfast foods shelf, or easy-to-grab snack section.
Whether your pantry is big or small, remember to plan the layout of your cupboards by frequency of use. Rather than trying to make every aisle look beautiful, keep in mind that items you use most often go on the higher shelves. In addition to this, you can use dividers and baskets to organize your pantry. Purchasing clear containers of standard sizes is another great way to keep items organized.
In addition to frequency of use, you can organize your pantry by size. Large items should go at the front of the pantry, while smaller items should be placed at the back. This will prevent you from wasting time searching for smaller items, which could be stored behind large boxes. By doing this, you’ll be able to organize your pantry by frequency of use and eliminate any waste.
Once you’ve determined how often you use certain items, the next step is to create an efficient system for storing and removing expired foods. While this may seem like a daunting task, it’s actually quite simple. You can use a trash bag to discard any stale food, use a Sharpie to write a kitchen inventory, and a handheld vacuum to keep the pantry clean.
Paint the inside of your cabinets a light color
Before you begin painting the inside of your cabinets, it is important to remove the doors. This will allow for greater ventilation and easier access to the interior. It will also allow you to clean the inside of your cabinets before you start painting. Using a wet rag, wipe the inside of the cabinet. Once dry, you can paint the interior.
While it is not necessary to paint the inside of your cabinets, it can be a great way to add color to your kitchen. It is possible to use the same color as the exterior, or you can use a different color entirely. If you decide to paint the inside of your cabinets, make sure to use primer before you start painting. Also, try to use easy-to-clean paint. If you have small children and pets, make sure to use a non-toxic paint. This will prevent the paint from spilling on shelves and floors.
If you’re unsure of which color to use, it can be helpful to hire a professional. These services are a lot cheaper than replacing your cabinets. If you choose the wrong color, you may have to repaint the cabinets multiple times, which can take up more time and money.
It’s also important to clean the inside of your cabinets properly. Remove any items you may have stored inside before painting them. Use soapy water and damp rags to remove all dirt and grime. To remove any oil or grease, you can also use a degreaser. If the cabinets were previously painted, you will also need to sand them with 180 to 220 grit sandpaper. This will dull the surface and make it easier for the paint to adhere.
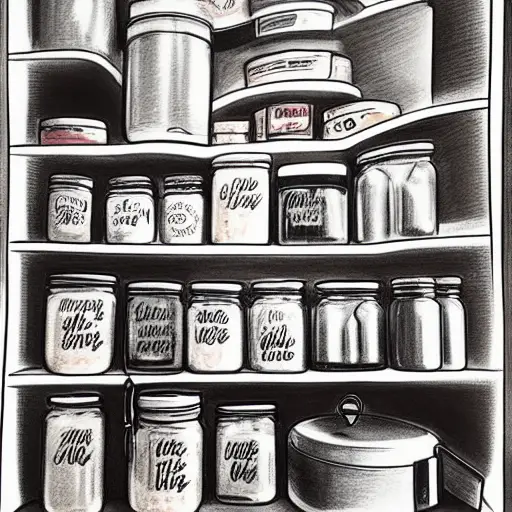
Label your containers
Using labels is an easy way to differentiate between different categories. It also makes it easier for kids to find snacks or identify where they are in a pantry. It can also make it faster to prepare food and find documents. Here are some tips to help you label your containers. They will help you organize your pantry and save time.
Organize your containers by type and color. Use stickers or professional-grade labels. For example, if you’re storing food, use different labels for each food category. You can also create smaller labels that are removable. Lastly, remember to include an expiration date on the containers.
The first tip in organizing your pantry is to label your containers. It’s also a good idea to use rubbing alcohol to remove Sharpie marks. You should also sort items into color-schemes. Joanna and Clea Gaines suggest arranging colorful snacks in ombre patterns, while neutral snacks should be stored in a muted color palette.
Labeling containers is an easy way to organize your pantry. Despite its practicality, labels are also an excellent way to personalize your pantry. For example, you can use them to label mason jar lids and storage canisters. Labels can also indicate the date when you bought a particular product.


