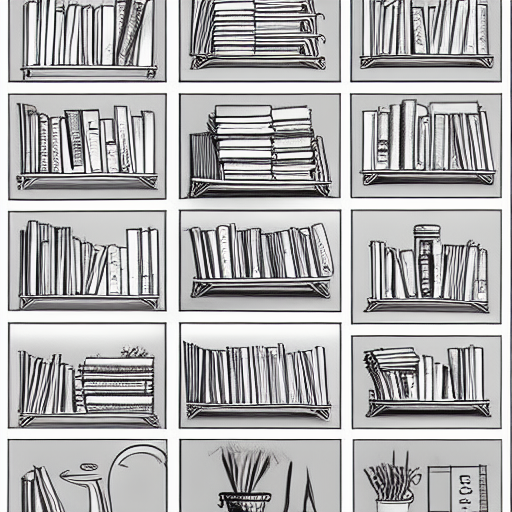
When hanging shelves, it’s important to follow the proper procedure to avoid mistakes. Several tips can help you in this regard, including marking the location of the brackets and using drywall anchors. In addition, you can style your shelves in any way you like, including painting them. These tips can make the process of hanging shelves a lot easier.
Marking the location of the brackets
Marking the location of the brackets is essential when hanging shelves. First, measure the height from the floor to the top of the first bracket. Then, mark the placement of the second bracket, lining it up with the first mark. Once the shelf is centered, screw the shelf to the bracket.
Mark the location of the brackets with a pencil. You can also use a digital stud detector to check the location of wires and pipes. Ensure the wall is level before screwing in the brackets. Lastly, make sure the shelf is at eye level, or at least a little higher than the studs. If it’s not, you’ll need to add plastic wall plugs. This will ensure the screws are secure.
After locating the studs, hang the shelves. If they’re level, use a spirit level to ensure that the bracket is vertical. Place the brackets under the shelves. You’ll be able to see the location of the brackets easily if you mark them properly. Marking the location of the brackets is critical, because they’ll be attached to the wall at different points.
If you’re using screws to hang shelves, you’ll need to attach the brackets to the wall. Before screwing the shelves, make sure to measure the distance from the shelf to the keyhole opening. If there are no studs, you can use hollow-wall anchors.
The spacing between brackets depends on the shelf’s length. For example, a 24 inch shelf won’t catch two studs, so you’ll need to hang the bracket on two studs. To ensure consistency, mark the location of the brackets before you install them. Once you have the brackets installed, take a few minutes to check the level of the shelves. If you’re unsure about the spacing, have someone hold the shelf up against the wall and make sure everything is level.
Avoiding hollow-wall anchors
When you’re hanging shelves, it’s important to make sure that you’re using the proper wall anchor. A good rule of thumb is to use molly bolts or toggle bolts. Molly bolts are best for light-duty shelves, while toggle bolts are best for heavier units. Whether you’re using wall anchors or toggle bolts, remember to drill a pilot hole in the wall before hanging the shelves.
The most common type of drywall anchors is plastic expansion wall anchors, which are available in several sizes and colors. A larger anchor will require a larger screw and will give your shelf more weight-bearing capacity. A smaller diameter anchor will also require a smaller hole, and you may have to use an older, worn drill bit for this type of anchor.
Before you install wall anchors, make sure to drill a pilot hole to ensure that the screw is centered. Use a 9/32-inch drill bit for this step. After the hole is drilled, use a rubber mallet or a small finish nailer to tap the anchor into the wall.
Mark the location of the screws using painters’ tape. The tape should span between the two hole locations. Once you have marked the locations of the wall anchors, measure the distance between the two holes with a carpenter’s level. This way, you’ll be able to match the anchor locations to the keyhole slots on the shelf units.
You can also use French cleats to hang shelves instead of hollow-wall anchors. These are beveled strips that attach to the wall with screws. They’re best for light-weight shelves and frames.
Using drywall anchors
If you want to hang shelves on a wall, you can install them using drywall anchors. These anchors are commonly called Molly bolts and are expandable metal pieces with pointed tips. Before drilling the anchor into the drywall, you should make sure you drill a pilot hole. In addition, you should use a drill bit with a long enough length to penetrate the drywall.
Some anchors come with screws, but make sure to use the correct size. Screws may not fit all drywall, and overtightening can strip threads. Make sure to check the manual for the exact screw size required for the anchor. You might also need to use extra screws if your shelves require them.
When choosing drywall anchors, make sure to choose one that is designed to support the weight of the shelves. Some anchors have a weight limit of 50 pounds. You can also check this with the store clerk or the manufacturer’s website. If you are unsure, you can always choose a different anchor for your shelves.
Before drilling the anchors, you need to determine the exact location for the shelf to be hung. It is best to choose a place with a good level. Once you’ve determined where the anchors will be placed, you should carefully measure the length and width of the shelf. If the shelf you are hanging has brackets, you can also place the anchor through them.
Another type of anchor is the toggle drywall anchor. This type is made of metal and includes a sturdy anchor that spreads across the opposite side of the wall. This type of anchor is considered to be the most durable. They should be used on plaster or concrete walls. Using drywall anchors for hanging shelves is a great way to hang storage shelves on the wall.
Using painter’s tape
When hanging shelves, using painter’s tape can make the process easier and faster. It can be applied quickly and accurately without the need for special tools. To apply the tape, unroll it and rotate it against the wall. Once you’ve mastered this technique, you’ll be able to apply it with speed and accuracy.
Painter’s tape comes in various widths. You can choose one that’s a quarter-inch wide or a half-inch wide depending on the size of your shelves. You can also choose colors that match your brand logo or convey a certain mood. The best part is that you can remove the tape once the paint is dry. You can reuse the painter’s tape to create new designs or label your containers.
You can also use painter’s tape to determine the exact spacing between shelves. This will help you see the proper spacing, and it will also prevent cracking your walls. You can also use the tape to catch dust and remove it easily. This will make the process of hanging shelves a breeze.
Before applying the painter’s tape, you need to make sure that the surface is clean. Otherwise, the tape will not stick to it properly. To avoid problems with the tape, you can use a damp rag or a detergent solution to clean the surface. Most painters prefer TSP-PF (phosphate-free) detergent.
Painter’s tape is available in different types for different surfaces. Choose the appropriate one for the job. It will help prevent paint bleed and will prevent bubbles from forming. It will also adhere better to the surface than masking tape.
Using figure-eights
When using figure-eights to hang shelves, you’ll want to make sure that you’re using one that is close to studs so that the shelf can sit flush with the studs. If your studs are too far apart, you can use hollow-wall anchors instead of figure-eights.
The first step in hanging shelves is to locate the wall studs, and use a level to mark the studs. Once you’re sure the wall is level, use a light pencil line to mark the top of the shelf. The shelf will cover this mark once it is installed.
You’ll also need a jig to hold the wood, which can be a piece of wood or a thin slab nailed to the wall. A piece of wood is also helpful, but it is not essential. You’ll want to mark the wood so you don’t run into trouble. You should also use a level to make sure that the shelf is straight and level. After the brackets are set, you can hang your shelves!
If you’re hanging heavy bookshelves, be sure to follow the manufacturer’s instructions. Once you have hung the shelves, attach the shelf standards to the wall. It’s easier to attach one shelf standard at a time if you have someone helping you but it’s possible to do it by yourself if you’re using the proper tools. Once you’ve placed the shelf standards on the wall, make sure to center the first one over a stud. Then, using an awl, insert the screw into the hole at the top of the shelf. This will make the screw easier to set.


