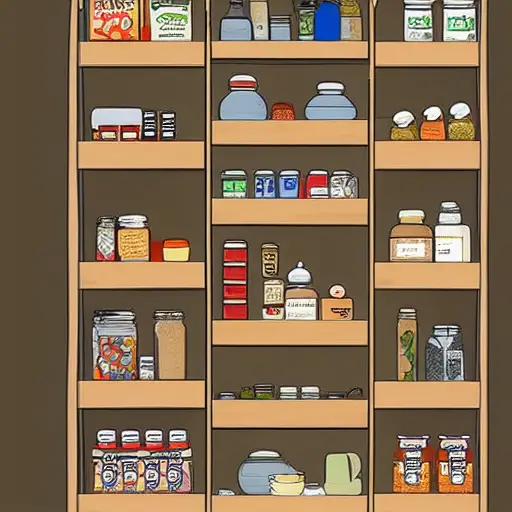
There are many ways to organize your kitchen pantry. You can organize by zone, use oversized bins, label them, and rearrange shelves so that vertical space is maximized. Some tips to keep in mind include: organizing by theme; using themed baskets for baking ingredients; and creating a system of standardized labels for all bins.
Organize by zone
When organizing your pantry, consider dividing it into zones. These zones can be based on food type, expiration date, or meal. By using zones to organize your pantry, you will find it easier to find items you need for certain recipes or daily needs. You will also be able to notice when you’re running low on staple ingredients.
For each zone, choose organizers that make sense. For instance, in the dry ingredient zone, use clear, airtight containers so you know exactly what’s in stock. For mixes and frostings, use a shelf riser to organize them in an organized way. You can also buy a pull-out basket for bags and rolls of parchment paper.
Once you’ve decided which pantry items belong in which zone, label them. This will help you easily find them and avoid overbuying. You can purchase labels for your pantry on Amazon for a reasonable price. Another great website that offers pantry labels is Organizing Moms, which is updated regularly.
Your pantry is a vital component of your kitchen. You use it daily to prepare meals and snacks. However, it can easily become a cluttered mess if you don’t keep an organized pantry. Here are some simple tips to help you make your pantry more efficient:
Use oversized bins
Oversized bins are a great way to maximize pantry space while creating a neat, organized look. They are an easy way to store bulk items and can even be stacked for added storage. You can also use them to corral snacks or fresh produce. These storage bins are also great for creating a second refrigerator drawer.
The first step is to check your pantry to ensure that it has enough space to hold the oversized items. If you’re remodeling, look for shelves that are tall enough for oversized items. Then, plan out the new pantry with tall shelves. Whether you have a large pantry or one that is small, an organized pantry can make your life a lot easier!
Another useful way to organize a pantry is to create an open shelving space. This way, you can showcase your glass canisters and spice jars. You can even convert an unused hallway or kitchen corner into a pantry. Another option is to install a modular rack that has plenty of shelving. A pretty area rug will also add polish to the space.
Another tip for organizing a kitchen pantry is to use clear plastic containers. These storage bins are durable, and they can be cleaned easily with soap and water. Most bins are made of polycarbonate, which is a durable plastic that is dishwasher safe. They come in different sizes and shapes, and they are stackable.
Create labels for bins
If you want to create labels for bins in your kitchen pantry, you’re not alone. It’s a great way to make your space more organized and efficient. You can use free storage label templates found on sites such as Canva. These labels are also editable, so you can customize them as much as you want.
You can also buy preprinted pantry labels from companies such as Talented Kitchen. These labels have lipped edges so you can slide the labels in and out of them. They also come with a dry erase surface. You can even buy them online and use them in your kitchen pantry.
The basic labels are designed to be easy to print, and you can choose any color or style you want. You can even create custom labels for the bins in your pantry. Just create an account with Avery to access free label designs. You can also create your own designs using the Avery Design & Print Online tool. The software is easy to use and you can design and print them from anywhere.
Before printing your labels, make sure to make sure they fit properly. You should also make sure that the paper is white and plain. Once you’ve printed your labels, you should give them a few minutes to dry. Then, use scissors or a paper trimmer to cut them out.
Rearrange shelf spacing to maximize vertical space
If you have a kitchen pantry, one of the best ways to maximize vertical space is to re-arrange the shelving to maximize the height of the shelves. Keeping items at eye level increases visibility and minimizes the need to rummage through the pantry for the ingredients you need. In addition, vertical positioning of shelves allows you to store similar items in dense groups.
For example, you can place everyday food in the front part of the closet, while overflow items in the back section. For example, put extra cereal and grains behind the pasta/rice section. Another way to maximize vertical space is to use the over-the-door shoe organizer. You can also use the space above the cabinet doors to display collections.
The bottommost shelf usually sits twenty to 24 inches above the floor. Try raising it by two inches to make items more accessible and reduce wasted space. This will also allow for larger items and crates on wheels. A wire organization system can be purchased online. These organizers are easy to install and remove.
A rollout is a convenient storage solution for tall items. The sloping sides allow you to see what’s underneath. It also makes it easier to read labels. Also, a rolling plant stand transforms the floor of your kitchen pantry into a functional appliance garage.
Store dry goods in airtight containers
Airtight containers are great for extending the shelf life of your food. For example, you can store a package of flour in an airtight container for six months or more. And the best thing is that you can reuse these containers. Just make sure to use containers made of non-porous materials, such as glass or high-quality silicone.
While it’s easy to use resealable plastic bags, they aren’t very durable. If you’re using them to store food, group similar items together. Also, don’t use plastic takeout containers unless they’re clear. Otherwise, it’s best to reuse glass jars and keep them clean so they can be reused in the pantry.
Dry goods such as sugar and cereal need to be stored in airtight containers in order to avoid moisture and pests from contaminating them. Also, storing dry goods in airtight containers prevents them from hardening and getting stale. This way, all of your pantry products retain their freshness.
While plastic containers are a popular option, glass and ceramic containers are also a sustainable choice. These materials allow you to be more environmentally conscious while also being budget-friendly. But make sure to choose containers made specifically for dry food.
Label bins with chalkboard paint
Using labels for your kitchen pantry storage bins will make finding things easier and more convenient. These handy labels are 2 3/4″ by one” (7cm x 2.6cm). They feature contrasting black and white text and are dishwasher safe. You can use them for smaller containers or larger bins.
To customize your bins, you can use chalkboard paint inside them. The paint dries quickly, so you can apply several layers. Once the paint has dried, write your labels over the painted section. You can wipe away the paint when you’re done without disturbing the interior.
A chalkboard paint pen is another way to label food containers. This marker is easy to remove with a damp cloth, and you can use it again for other items. You can also use painter’s tape to keep your labeling neat and straight. Using a clear bin will also help you organize food by category. Alternatively, you can use acrylic paint markers to label containers.
If you want to create a more permanent solution to kitchen pantry organization, you can paint bins with chalkboard paint. These paints come in a brush-on or spray-on formula. You can use the spray version on plastic bins and jars, and you can even cover magnets with chalkboard paint.


