If you’ve ever wondered how to plant herbs in Mason jars, you’ve come to the right place. There are a few simple steps involved in transplanting herbs from pots. The first step is to pull apart the roots of the herb. Next, pack potting mix around the roots. Finally, top off the jar with water. Some plants may require that you remove some of the potting mix. This is fine, as long as you leave as little exposed root system as possible. After transplanting the herbs into the jar, be sure to water them as soon as possible.
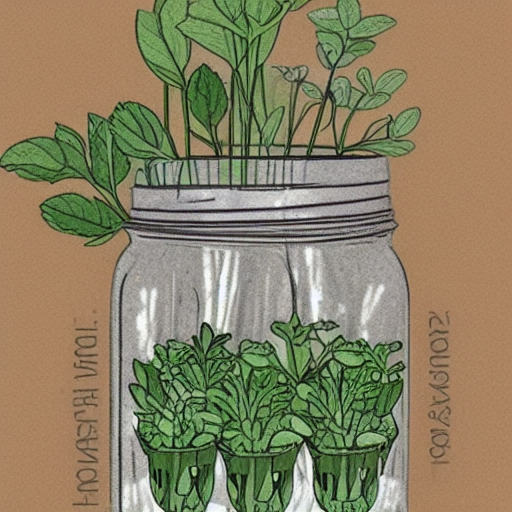
Growing herbs in a mason jar
Growing herbs in a mason jar is an easy way to grow fresh herbs without the hassle of a garden. You can decorate your jar with a cute label or tag and even add a ribbon. Make sure to keep the soil moist and avoid letting it dry completely. Also, don’t forget to prune your herbs occasionally to encourage them to grow. They are also known as “cut and come again” plants and will grow again if they are pruned.
Growing herbs in a mason jar is very easy and is an excellent way to add style to your windowsill. Make sure that the jar is big enough to accommodate the herbs that you wish to grow. Also, you should make sure to provide adequate lighting for your herbs to grow well. In addition, it is recommended to fertilize your herbs once or twice a year. The soil in your jar should be moist but not wet.
The jars are available in different sizes. The quart size is ideal for growing more of the same type of herb. Sand or rocks should be added to the bottom of the jar to help it drain well. For extra visual appeal, place rocks around the jars or place gravel to ensure proper drainage. When it’s time to plant the herbs, remember to follow the instructions on the packaging.
Labeling mason jars with herbs
One great way to display herbs in mason jars is to label them. You can use a permanent marker or a Sharpie to write the names of your herbs. You can also buy name-tags and tie them to the jar with twine. You can also make your own brass label holders and insert small slips of paper in them. You can then display your herbs in their new jars. Remember to water them regularly and give them plenty of light.
You will need a Cricut machine to make these labels. I used a Cricut Joy for this project. Make sure to wash your mason jars thoroughly with hot water before applying the herb labels. You should also allow them to dry completely before applying the herb labels. You can find printable instructions for this project at the bottom of the article.
You can also place river rocks in the bottom of your mason jars to encourage drainage. You can also add broken pottery shards to the bottom of the jars to add visual interest. After you’ve completed these steps, you can plant your herbs in your new container.
Growing herbs in mason jars is easy and inexpensive. You can purchase inexpensive jars at a thrift shop or flea market, or borrow jars from friends or family. Another great thing about mason jar gardens is that they don’t take up much space. You can place them on your kitchen counter, on your windowsill, or on a small shelf. You can also use them for other kitchen purposes such as pickling vegetables.
Growing parsley in a mason jar
Growing parsley in a mason jug is a simple, self-sustaining way to grow the herb. Since parsley is a relatively poor germinator, it will benefit from multiple jars. You will need to provide consistent water and at least six hours of sunlight a day to ensure successful growth. Parsley is a biennial plant, so it will reach maturity after about two years.
A quart-sized Mason jar is ideal for growing herbs. This is because it can accommodate a variety of your favorite herbs. Choose herbs that are tender and non-woody. Woody herbs will require large amounts of soil and will have a difficult time growing in a mason jar.
Growing thyme in a mason jar
Growing thyme in a masons jar can be a fun and easy hobby. You can place the jar on a windowsill in a sunny window. Once the plants are grown, you can harvest them and use them for your cooking. A little bit of thyme goes a long way.
After planting the seeds, you need to prepare the soil for transplanting. You will need to spread them in a sunny window and water the soil to make sure they are moist. The transplantation process may be a bit of a shock to the plant, but it will most likely be successful if you handle it carefully.
Ideally, you will grow herbs that require a lot of sun. A windowsill is a great location, but they will also look lovely trailing from your bookshelf. A jar also makes a nice centerpiece on your dining table and offers a fresh garnish for your meals.
Luckily, many herbs are easy to grow. Thyme, rosemary, and basil are all great choices, and can be grown using cuttings. Another advantage of growing herbs in a mason jar is that you won’t have to worry about watering them as frequently as you would with a container plant. A mason jar has one entrance, so water doesn’t escape the jar and the plants will absorb it. The remaining water will evaporate into the air.
You can buy organic or heirloom seeds to grow plants from seed. However, remember that not all seeds grow well in soil. So, if you want to use a jar to grow thyme in a container, be sure to read up on the proper way to plant them.
Growing sage in a mason jar
Growing sage in a mason-jar is an easy and efficient way to grow your favorite culinary herb. Sage is a perennial plant that thrives in moist soil, and needs plenty of sunlight. Once it has grown to a mature size, you can harvest the leaves for seasonings and dishes. For best results, you should plant several jars at a time.
To start, prepare the soil for planting. Use organic or heirloom seeds. Be aware that not all seeds will grow in the soil, so you should choose carefully. Once you have selected the seeds, plant them on the soil near the center part of the jar. Avoid placing the seeds too close to the glass walls. Once planted, the seeds should sprout within a week. If you’re able to see some sprouts, you can remove them from the soil.
Before planting the plant, fill the jar halfway with potting soil. You can also add some stones or pottery bits to prevent rotting roots. The soil should be moist enough to allow the roots to grow properly. Watering the jar is important every day, but remember not to overwater or it may turn yellow.
You can buy potting soil and seeds at a discount store. Make sure to select quality seeds. It is best to avoid cheap and expired seeds. If you buy cheap ones, they may be old or damaged. In addition, the seeds may not sprout and will be useless. You can also look online for good seeds.
Growing dill in a mason jar
Growing dill in a mason-jar container is a great way to grow herbs without having to spend a lot of money on potting soil. Dill is a perennial plant that can grow as tall as five feet, but most varieties grow no higher than three feet. Its foliage is feathery and grows around the stalk. The flowers are small yellow umbrellas that can be 6 inches across. The dill plant needs about six hours of direct sunlight a day.
Dill does not require a lot of water to grow. It will reseed itself next year if it gets too dry. Once the leaves reach about two inches in height, it is time to thin out the plant. It will not require much water, but you should be careful not to allow it to become too large or too small.
While it may seem like an easy task, harvesting dill is a bit tricky. If you don’t harvest the leaves at the right time, they’ll begin to wilt. The best time to harvest dill is when the plant has four or five leaves. This is when the oils are the most concentrated. It’s also the best time to harvest before the flowers start to bloom.
Dill is an herb that has many uses. It is often used in cooking and as a garnish. It is a member of the celery family and is considered beneficial for digestion and constipation. It is also an anti-inflammatory and can help reduce joint pain. The plant also contains high levels of calcium and iron and is ideal for bone health and blood sugar regulation.


