The first step to installing built in closet shelving is to measure the space. This is especially important when installing shelves that need to be level. You should use one-inch-by-two-inch pine boards that are about fourteen inches long. You should then attach the shelf supports to the side walls of the closet using 1.5-inch screws that are nailed into the studs. Once the shelves are level, you can begin to install the pull-out shelves.
Build a single shelf-and-pole shelf
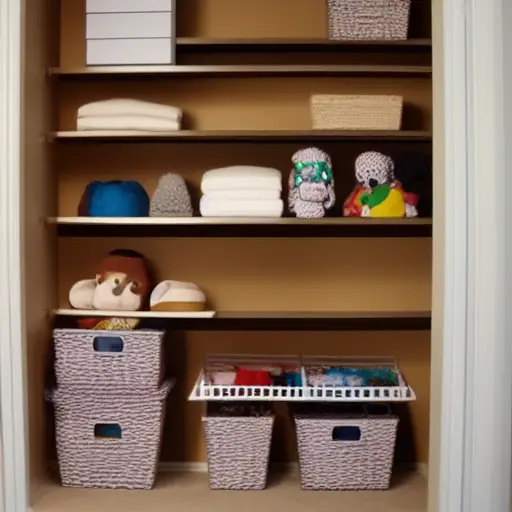
One way to make your closet space more functional is to install single shelf-and-pole shelves. These shelves are tall enough to hold long dresses and coats, and are a great solution for tight spaces. Ideally, you should install these shelves at least 64 inches from the floor, and you can raise them a bit higher if you’re extra tall.
Start by marking and measuring the location of the shelf you want to install. Make sure that the shelves fit snugly, and if not, you may need to use additional fasteners. You can use nails to secure the shelves, but be careful not to use nails that are too long or they’ll pop out of the bottom of the support boards.
Make sure to take measurements at the front, middle, and back of the closet. The measurements may differ slightly from the back to the front. Also, make sure to take measurements at different heights.
Install a pull-out shelf
Installing a pull-out shelf in built-In closet shelving can add a unique feature to your custom closet. It makes organizing and storing items much easier. Moreover, you don’t have to worry about rearranging your shelves. Pull-out shelves can also fit into existing furniture.
To install a pull-out shelf, the face frame of the built-in closet shelving must have an open space for the shelf assembly. The gap should be at least one-quarter inch wider than the existing one. Once assembled, the shelf assembly should fit in the opening and be square to the face frame of the cabinet.
Typically, a pull-out shelf can fit a standard-size, 24-inch-deep base cabinet. Its construction requires a 1×4 pine frame and a 3/4-inch birch plywood bottom. The plywood is readily available at home centers and lumberyards. You can get half sheets of plywood at these stores and cut them to fit your cabinet’s dimensions.
Secure shelves with 1.5″ screws
When installing built-in closet shelving, be sure to use 1.5″ screws to secure the shelves. These screws should penetrate the stud or gypboard as well as the shelf cleat. If the screws are longer than this, you’ll run the risk of stripping the head. Also, make sure to pre-drill the holes first so they are not too hard to drive.
The first step is to prepare the shelves for installation. Make sure to measure and mark the shelves to ensure the proper fit. Next, cut 1x2s and plywood strips to match the shelves. If you’re installing multiple shelves, use a vertical support pole with predrilled holes and clips to secure the shelves.
Once you’ve finished painting the shelves, install the supports. The supports should be 14 inches long and made of 1″x2″ pine boards. Make sure the shelves are level. Next, secure the supports to the side walls of the closet. If using screws, screw the supports into the studs.
Next, use a stud finder to locate studs and drill 1x2s along the lines of the shelves. Long 1x2s should be drilled lengthwise while shorter ones should be used for side supports. Use a level to make sure the supports are level. If a stud is missing, wall anchors can be used.
Measure studs
Before installing new shelves, measure the studs on the walls to determine the distance between each stud and the center of the shelf. This will ensure that the shelves are leveled. If the shelving is long, place a bracket in the middle and space the other two feet apart. Use a measuring tape to measure the distance from the wall to the center of the shelf, subtracting an inch for the thickness of the end brackets and for wiggle room. You may want to use a thin wire for support and nail the shelf directly into the studs, but make sure to keep one wire per shelf support.
The distance between the studs is important when installing wide shelves. In most houses, studs are spaced approximately 16 inches apart. However, some homes may have 24 inches between studs. Once you know this distance, you can proceed to determine the exact location of the second stud. If you are unsure, you can check the wall for nail heads. You can also shine a light on the wall to find the studs.
If you are installing heavy shelves, make sure to fasten them to the wall studs behind the drywall. Otherwise, you may need to use drywall anchor screws to secure the shelves to the wall. If your walls are made of concrete, you must use special concrete screws that are available at your local hardware store.
Drill pilot holes for 1.5″ screws
Whether you’re building built-in closet shelving for your home or simply replacing an old one, it’s best to drill pilot holes for 1.5-inch screws. This will ensure that the screws are centered and the wood is not damaged. Additionally, drilling pilot holes will help prevent stripping the head of the screw.
First, determine where you’re going to install your shelves. You should mark the walls with pencil to help you keep the shelves level. Once you’ve done this, install the brackets by placing them on the lines you’ve traced with a pencil. It’s also important to use a level to check whether the shelves are aligned straightly.
Next, you need to drill a clearance hole. This hole should be slightly larger than the screw threads. This will help the screw pull the parts together. When drilling the pilot hole, use a small drill bit. Make sure you use one with a smaller diameter.
You’ll need a wood bit and an electric drill. The pilot holes will help you drive the screws without causing any damage to the drywall. You can also use a larger drill bit to drill the holes on the wall studs. You can lightly hammer drywall anchors into these holes as well.
Attach shelf to wood brackets
The first step in attaching a shelf to wood brackets for built in closet shelves is to determine the exact location of the studs in the wall. You can find studs by tapping or knocking on the wall. If you cannot find studs, you can drill extra holes on the wall. Also, make sure that the shelves will be level.
Measure the shelves at the back, center and front. It is important to note that the measurements will differ from one shelf to another. You can also use different heights. For example, the back of the closet may be slightly lower than the front, so make sure to take several measurements for each shelf to make sure the shelves will fit correctly.
Once you have measured the wall thickness and determined the studs, you can fasten the shelf. You can use toggle bolts for drywall and plaster walls. You can also use concrete screws for masonry walls. The size of the screw should be small enough to fit through the brackets and not too big to cause the shelf to fall out.
Sand shelves
Before installing shelves, it’s important to prepare the wall surfaces for painting. Sanding will prevent paint from absorbing moisture and will also make the walls look more professional. It also helps to use a water-based primer instead of oil-based paint. While the paint is drying, you can install the shelves.
You can also use pre-cut, 1×2 or 1×6-inch boards for the shelving fronts. These pieces should be sanded to remove any splinters. If the shelves are to be painted, use two coats of paint and lightly sand them in between.
Once the shelves are sanded, you can finish them with stain or varnish. You can use either 180 or 220-grit sandpaper for the process. You should also mark the spots where the shelves will be installed and then measure the distance between the two points. Next, you can attach the shelves with screws or other materials. You can also use wood glue to help them stay put.
Sand the plywood shelves completely before assembling them. Use an orbital sander with 180 or 220-grit sandpaper to achieve the desired smoothness. Be careful not to over-sand the plywood as this will damage the veneer. Once the shelves are ready, attach them to the vertical shelf supports using eight pocket-hole screws. If you don’t have pocket-hole screws, you can drill them with a 1-1/4-inch pocket-hole drill bit.


