A built-in closet organizer can be a useful addition to any bedroom. There are a few things to consider before buying one. These include measuring the area, cutting the wood, and securing the pieces in place. You should also know the differences between a pre-made one and a custom one.
How to measure
When buying a built-in closet organizer, it is important to measure the room where it will be placed. Generally, closets have 8 to 9-foot ceilings, but some have higher ones. If you’re not sure how high your ceilings are, you can use wooden shims to level the space. You should also account for baseboards, which can affect the height of your closet.
To measure a closet, take measurements from the floor to the ceiling and at three points. The lowest measurement should be at the bottom of the closet, while the highest measurement should be at the top of the closet. When you’ve finished measuring, round down your measurement to the nearest quarter inch. Make sure to account for any obstacles, including doors, electrical panels, and access panels.
Once you’ve taken measurements, you’ll be ready to install your new closet organizer. Make sure you mark studs where you’ll be mounting the closet organizer. You’ll also need to check the floor level. If you’re installing a built-in closet organizer on a wood floor, use wood shims to level the unit.
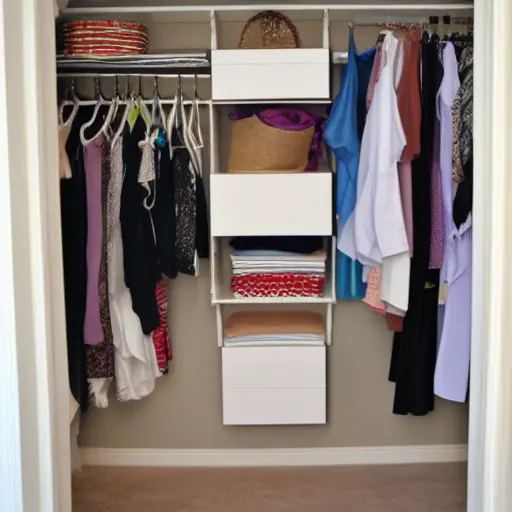
You should also measure the depth of your closet. A minimum depth of 24 inches will allow you to hang clothes and also allow for additional features, such as a double-hanging rod. You should also remember to allow room for shelves that store shoes. Space clothing shelves at least seven to 12 inches apart to prevent overcrowding. Remember to take into account that each piece of clothing takes up different amounts of space when hanging. For example, pants take up about an inch, while skirts and jackets can take up two or more inches.
Getting the measurements right is essential for making a custom closet organizer. You should use a measuring tape, a pencil, and a piece of paper. Once you have the measurements, you can start designing the perfect closet. You can even use a computer design program to visualize the final result before you cut the fabric.
How to cut
If you need to make a built-in closet organizer, you’ll need to know how to cut two pieces of plywood to the correct width. To do so, you should rip the plywood sheets to a width of nine to seventy-three inches and use a circular saw to cut them along the long axis. Next, crosscut the parts to size, using a #220 grit sandpaper.
Once you’ve cut the board, you can use it to create a shelf that wraps around the closet. You’ll need a 16″-wide shelf board. Insert the shelf board on the wall, and use one-quarter-inch brad nails to attach it. Be sure to use a finishing nail at several locations.
To cut a plywood shelf, start by cutting a piece of heavy paper slightly smaller than the size of the closet. Then, use a framing square to trace the cabinet’s outline on the paper. Hold the square against the wall to use as a guide. Cut the cubbies using the same methods as for the large cubby. If you’re making smaller cubbies, you can use a table saw or track saw to make the dados. Once the pieces are attached, install the shelf boards inside the cubbies by screwing them into the studs.
Next, cut the plywood sheets into three pieces. You can use a track saw from a hardware store to cut the plywood, but make sure to set it for horizontal cuts. A sliding miter saw or a circular saw and square can also be used. If you’re unsure of the cuts, you can use styrofoam panels for support. The center shelf must be fixed, but if you can’t make it work, you can use styroam panels instead of plywood.
Creating a DIY closet organizer is a fun project for any home improvement enthusiast. To make this project a success, you need to get a good idea of the measurements and the layout of the closet. If you don’t have a jigsaw, use a straight edge and a pencil. You can also trace and cut the plywood by hand. Once you’ve cut the plywood pieces, you can paint or finish the project by plugging or edge banding the plywood.
How to secure
When installing a built in closet organizer, you need to secure it to the studs in the wall. This requires using a stud finder to locate the studs and using drywall anchors to attach the rail to them. You can also secure the upright panels of the organizer to the wall with drywall screws.
Before you install the organizer, you need to make sure that the pocket holes are drilled. These are located on the sides of the organizer pieces. To drill these holes, you can use an orbital sander fitted with #220 grit sandpaper. Once you’re satisfied with the hole locations, apply caulk to the wall and let the sandpaper dry completely.
When installing a built in closet organizer, make sure that the vertical rods and shelves fit the dimensions of the storage area in the closet. If you’re installing a long rod or shelf, you can use a framing square to measure. Then, you can use the paper as a reference. You can also use a table saw or track saw to cut the pieces to the desired sizes. Next, insert the shelf boards into the cubbies. After that, screw the cubbies into the studs.
Pre-made vs. custom
The basic difference between pre-made and custom built-in closet organizers is the materials used. While many closet organizers are made from wood, a custom-made one is made of more sturdy materials. Some closet organizers are made from plywood or Medium-Density Fiberboard, or MDF.
A custom-built closet organizer is more expensive than a pre-made one, but it adds a lot to the value of a home. It is a benefit to new owners as well. In addition to that, most companies that design closets offer discounts or sales. It’s worth looking into both options and negotiating the price.
A pre-made kit can be a great way to organize a closet quickly and cheaply. You can mix and match the units to suit your needs, and you can add to them as you need more storage space. You can also use pre-made units for other spaces, such as your kitchen.


