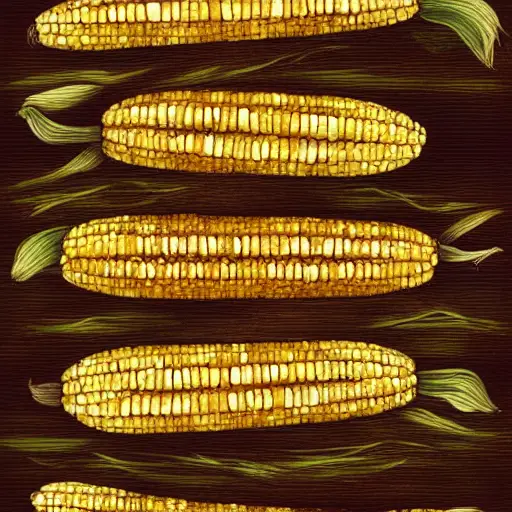
Keeping husks on grilled corn on the cob
Keeping the husks on grilled corn on a cob is a very important step to cooking a delicious grilled corn on the cob. The husk is a protective layer on the corn that holds the kernels in place. When corn is fresh, it has a bright green husk that tightly wraps the cob. The husk should be moist and shiny. It should also feel soft to the touch through the husk. If the husk is too dry or yellow, it is most likely overly old. If it has a small brown hole, it could be infested with insects.
It is important to soak the husks before grilling the corn. This will help prevent them from burning and help to retain the moisture. Remember to turn the corn every five minutes or so, and keep a constant watch over the heat. The husks will look slightly burned if they haven’t been properly soaked, but it doesn’t mean they are burnt.
It is also important to remember that husks help keep the corn from direct contact with the grill, which helps to steam the corn to tenderness. The husk also allows the smoky flavor of the grill to permeate the corn. It also makes it super easy to grill the corn.
The corn should be grilled for about 15 to 20 minutes. Once the husk is removed, it should be basted with melted butter. If the corn is too soft, butter it after you pull the husk. This is a personal choice and will depend on your own preference. The cooking time will vary depending on the grill’s temperature.
If you prefer not to use a grill, you can still keep the husks on grilled corn on a cob. You just have to be extra careful when removing the husk. The husks will cling to the golden cob, but they can easily fall off if you pull them back. During the cooking process, you can also add your favorite seasonings to the corn.
While removing the husk before grilling will reduce the corn’s smoky flavor, it will also make the corn more likely to stick and burn. By keeping the husks, the corn on the cob will steam in its own moisture. It will absorb the smoky flavor from the charred husks. This step is optional and will help keep the corn on the cob from drying out on the grill.
Making grilled corn with smoked lime mayo
Smoked lime mayo is an excellent addition to grilled corn on the cob. Its zesty and smoky flavor gives this snack a unique flair. Whether the corn is fresh or frozen, the husks add to the smoky flavor. The husks should be removed from the cob, but a small ribbon of husk can be left attached for a handle. The corn should then be placed on the grill, which should be preheated. If you like a slightly spicy version, you can add cilantro to the sauce.
To prepare this recipe, you can either grill the corn directly on the grill grates, or place it on a baking sheet. In both cases, it’s best to cook the corn for approximately 12 to 15 minutes, turning it occasionally so it doesn’t burn. To keep the husks intact, brush them with the marinade and then pull them back over the cobs. The husks add flavor and tenderness to the grilled corn, while making it slightly messier. You can also replace the husks with butter.
After the corn is grilled, it’s time to brush it with olive oil and sprinkle it with salt. If you want to get a little spicy, you can add a little smoked lime mayo or smoked paprika. Then, add the Cotija cheese and the cilantro to the corn. After that, you’re ready to serve! Make sure to prepare plenty of napkins, too.
To make grilled corn on the cob with grilled lime mayo, you need a grilled corn that is a little tender. It’s juicy and sweet. You can purchase fresh corn at grocery stores, farmer’s markets, and even your friend’s garden. If you can’t find fresh corn, you can also buy prepackaged corn in the produce aisle.
While this Mexican-style grilled corn is typically eaten on a grill, you can also serve it at room temperature or even refrigerated. If you don’t like cotija, you can substitute it with feta or Parmesan. You can also sprinkle the corn with some chili powder.
Getting perfect grill marks
If you want to get the perfect grill marks on your grilled corn on the cob, there are a few steps you can take. First, you should take your corn out of the husk and place it on the grill. Then, you should close the grill and rotate the corn halfway through cooking. When the corn is done, you can remove it from the grill and top it with butter and salt. If you don’t have time to grill the corn, you can steam it.
The next step is to make sure your grill is preheated. This step is essential to get even cooking and good grill marks. Secondly, you should select your corn carefully. Choose ears that have a tight, green husk, and avoid those with a dry, brown husk. Try to feel for plumpness, as this will help you get the perfect grill marks.
While some people like to put the whole cob on the grill, you should peel back the husk first. This will help the grill work faster and avoid letting the corn dry out. Another tip is to remove the tassels. This will make your corn easier to turn on the grill.
After you’ve gotten the husk off, you should rotate the corn every few minutes so that all the kernels get an even browning. Then, you should check the husk to see if it’s blackened all around. This will give you an idea of how much longer to cook the corn. It might take up to 20 minutes if you’re cooking it on a medium heat.
Next, you should make sure that the corn is close to the grill grate. Make sure that there are no open flames underneath the grate while the corn cooks. While the outside husk will get brown and charred, the kernels will retain their moisture.
Getting perfect grill marks on grilled corn is not difficult. You can use a portable grill or cook it over a campfire. However, it’s best to grill your corn over coals or hot embers. Otherwise, it could catch on fire and burn your corn husk.
Recipe
Grilling corn is a great way to enjoy the taste of fresh, grilled corn. The process is simple, and fresh corn releases steam as it cooks, which helps to keep the kernels plump and moist. Fresh corn doesn’t need soaking and is ready to cook right from the market. Place the corn on a grill grate, husk and all, and turn the corn frequently until it reaches a desired level of charring.
The corn should be tender, but not mushy, and charred in spots. If you don’t have a grill, you can cook it in a grill pan or in the oven. Remember to turn the ears every few minutes to ensure that they don’t overcook.
First, prepare the grill. Preheat it to medium-high. After that, strip off the outer husk. Next, coat the corn with butter and season with salt. Grill the corn for about half an hour, turning it over every 10 minutes. Remove the husks and serve the corn hot or chilled.
You can add other flavorings to your grilled corn on the cob. For color, you can sprinkle paprika on it. You can also use dried herbs in place of fresh ones. You can also omit the spices if you prefer. However, you should always use a little butter or oil to make the corn more tender.
Aside from butter, you can also use mayonnaise and cheese to season your corn. A bit of lime will add acidity and help it taste sweeter. Make sure that the corn is thoroughly soaked before cooking, as it will absorb the flavor of the sauce. Alternatively, you can use a compound butter on your grilled corn.
Grilled corn on the cob is one of the summer staples. To make it, you will need a few ingredients and an open grill. First, remove the silks and husks from the corn. Then, close the lid of the grill. This will prevent the husks from burning and prevent the corn from getting too charred.
If you want to serve the corn to a large group, you can wrap it in foil or a paper bag to keep it warm. This is a convenient way to serve corn to a crowd. Another benefit is that the corn remains hot for a long time, making it ideal for buffet serving. This recipe is quick and easy to serve. You can also add butter or salt to your corn to make it more flavorful.


