If you’re wondering how to grow plants in an AeroGarden, there are some tips that can help you out. These include planting the seeds at the same time to get the most out of them. This will allow them to receive equal amounts of sunlight, which will help them grow together. If they’re planted too far apart, they may not receive enough light. In addition, it will help to plant close to each other in an AeroGarden, but make sure they don’t overcrowd each other.
Less than 30 minutes to set up
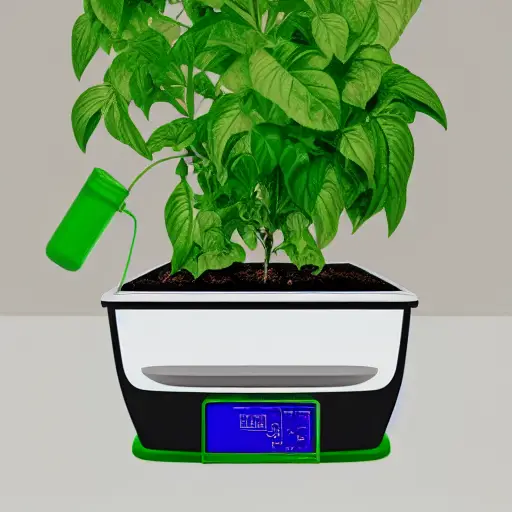
The AeroGarden is a convenient way to grow plants indoors. It comes with everything you need to get started: LED grow lights, a water bowl, an aerator, and seed pods or grow domes. The package also includes recipes for liquid plant food and instructions. Setting up an AeroGarden takes only a few minutes. All you need to do is add nutrients and water. Then, turn the indoor light on to start growing.
The AeroGarden has a watering system with a reservoir and a pump that circulates water in the base of the unit. The water is fed to the roots of the plants and is never stagnant. The pump can be set to run automatically or manually. When it’s time to refill the reservoir, a red water indicator will alert you to do so.
The AeroGarden system uses hydroponics, which means that plants grow without soil. Instead, they grow in suspended water that contains nutrient-rich nutrients. This helps your plants grow faster and cleaner than with traditional methods. You can even connect the AeroGarden to your smart device, like Amazon Alexa, to monitor their progress. The system also lets you set reminders to refill the water or add liquid plant food.
To set up your AeroGarden, you must first remove the plastic grow basket. Then, you need to separate the bowl and base. You can then plant your seeds in the AeroGarden, and it will sprout in about two to three weeks. To maintain its quality, you need to clean the AeroGarden regularly. You should remove any parts that are damaged or infected with pathogens.
Easy to clean
To maintain the beauty and freshness of your AeroGarden, you need to clean it thoroughly after every harvest. Ensure that you clean away any plant parts that are no longer producing fruit or flowers. Also, you should remove any plants that have bolted, which means they are trying to produce seeds instead of fruit. These plants will have a bitter taste and are not suitable for eating.
Cleaning your AeroGarden is easy if you follow the right procedures. Proper cleaning will eliminate germs and keep your aerogarden in perfect condition. It is highly recommended to clean your AeroGarden every month or so, especially before you are planning to plant a new crop. The best cleaner to use is vinegar, which is non-toxic and free from harmful chemicals.
To clean the AeroGarden, first unplug it from its power source and position it near a large plastic container. Then, unplug it and remove the light hood and the bowl from the base. Once it’s unplugged, use a small brush to remove any dirt or organic matter. Then, use a solution of a cup of vinegar or bleach to clean the inside of the AeroGarden.
After you have cleaned the AeroGarden, you can replant the plants. If you have already planted, you can simply wipe it down with a damp paper towel. For more advanced cleaning, you can use a solution of white vinegar and warm water. The vinegar is an effective natural cleaner and removes bacteria from the air. Its smell is almost undetectable after the cleaning process.
AeroGardens can accumulate bacteria and mold as water flows through them. To remove these bacteria and mold, you can pour a solution of half-cup of white vinegar and one cup of warm water into the bowl. Let the solution circulate for 5 minutes before rinsing the AeroGarden.
Water needs to be changed every month
The water level in your AeroGarden needs to be changed at least once a month, if not more frequently. It’s important to avoid using hard or soft water as these minerals can interfere with the nutrient content of the plants. Rather, use only the minimum amount of water that fills the tank up to one-third of its capacity.
It only takes a few minutes to change the water in your AeroGarden. Once you’ve done this, you’re good to go. You should change the water at least once every four weeks for fresher plants and herbs. Once you’re done with watering, you can feed your plants.
You should also clean the AeroGarden regularly. Dirt, algae, and organic matter can build up in the filter and pump. These contaminants prevent the plants from receiving the proper nutrients and oxygen. This is the most important step in keeping your AeroGarden clean and healthy.
Watering your AeroGarden is as easy as watering any other garden plant. However, make sure to add the nutrients at the same time as the water. By doing so, you’ll avoid an imbalance in the pH level, which can stunt the growth of your plants.
Support for plants
When growing plants in an AeroGarden, it is important to choose the right support system. Even though the plants will be smaller than plants in a conventional outdoor garden, they still need a few supports, especially if they grow large and produce fruit. Using a support system will help prevent the plant from being crushed or suffocated by its own weight.
The AeroGarden uses a looping water-nutrient solution to provide constant nutrition to the roots of the plants. This solution flows around the roots of the plants, absorbing nutrients as it flows by. This system is particularly useful for growing shallow-rooted plants, which don’t have deep roots. If the system needs to be adjusted or the nutrients need to be changed, users can simply press a button and wait for the light to blink again.
Adding fresh water is another way to add nutrients to the AeroGarden. Water should be changed every few weeks, and the water bowl should be scrubbed once or twice a week. It’s also a good idea to wipe the top of the AeroGarden weekly to remove dust and grime. You’ll also need to keep dead plants out of the AeroGarden.


